


Shading Emotes
'Ello there! If you've been on any social media site, you most likely in one form or another have used an emoticon. An emoticon is an icon that expresses emotion. Such as
Emotes are an easy way to express yourself and I'm going to teach you how to shade some.
Almost all emotes are sized to be 15x15 (unless you are making a larger one; tutorial by IceXDragon described here). You can use lots of programs to make them. I use MS Paint to make my emotes because I believe it's the easiest to control but you can use whatever you like.
An emote's outline will look like this (You can use it if you want.

Here's what it looks like at a bigger scale.

Emotes should look circular like the one above. I would recommend this size for all emotes at a standard size level. At this stage, I like to mess with the emote to see what kind of look I want it to have.
After you've established your outline for your emote, find out what color will be your base color. Make sure you use a color that has lots freedom to shade with. Some colors are more difficult to shade than others.
I'll use blue as my base color. (Blue is one of the easier ones to me.)


If you're satisfied with the color you've chosen for your emote, start looking for your darker shade of colors. An emote shares distributes light just as a ball would depending on where you have your light source coming from.

It kinda hard to see what I've done so I've re-sized it. (Like I've done will all the others.

I just added two different shades onto my emote. A darker one and a lighter one. Right now there are currently 3 different colors on my emote (excluding the outline). I left the middle of the emote without shading and the bottom right corner of the emote like that as well. The middle of your emote will most of the time have the color you started with (but this solely depends on where you have your light source coming from. ). The bottom right corner is an area where light source bumps from. I'll make it lighter later where you can see this. These physics doesn't only apply for emotes because if you put a ball on a table, you can also see this.


In this step, I added a darker shade and I've added some more lighter tones. Remember when I said I kept the bottom right corner at it's base color, well, I made it lighter but I'm still not done yet!


For your final shading to the emote part, you add some shininess! It always looks good on emotes. This would be your final step (YOU STILL GOT TO MAKE FACES, SO YOU AREN'T DONE YET) if you like black outlines but if you're like me, then you'll continue and do this to your emote:


You can stop here but I like adding more. It's not really necessary but it can't hurt to add more.


This is how the shading looks when completely done (with saturation added to make it look a bit more shinier and two more lighter shades to the upper left corner to make the emote overall look shiny.
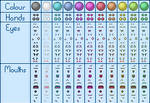
If you want to add hands to the emote you can. I would recommend keeping them within a 3 pixel radius. And they are shaded like an emote is. You use the base color and take the lighter tone and the darkest tone like this:


I did the steps more compressed this time so you didn't have to keep scrolling more. XD It's basically the same as shading an emote on a way smaller scale.
That's it! Since now you know how you shade an emote go and make one!
For emote faces, there are so many, I'll show you some of mine and link you to a deviation which can help you with more expressions.


I get my expressions by messing around. I would recommend you do the same. It's a technique that works very well for me (and it's fun!).
You can use this base below:
If you would like to animate your emotes as well, you could check out this P.E. Article written by IceXDragon